
The motor in a 24V ride-on toy controls how fast and smoothly it moves, directly affecting its power and performance. When the motor functions well, your toy runs efficiently, offering a fun and safe experience. If it’s underperforming, the toy may slow down or become jerky. Choosing the right motor and maintaining it properly can boost durability and safety. Want to know how to keep it running at its best? Keep exploring for more tips.
Key Takeaways
- Converts electrical energy into mechanical motion to drive the toy’s wheels.
- Controls the speed and acceleration of the ride-on toy.
- Ensures smooth and consistent movement during play.
- Affects the overall power and responsiveness of the toy.
- Maintains safety and reliability by preventing motor failure and overheating.
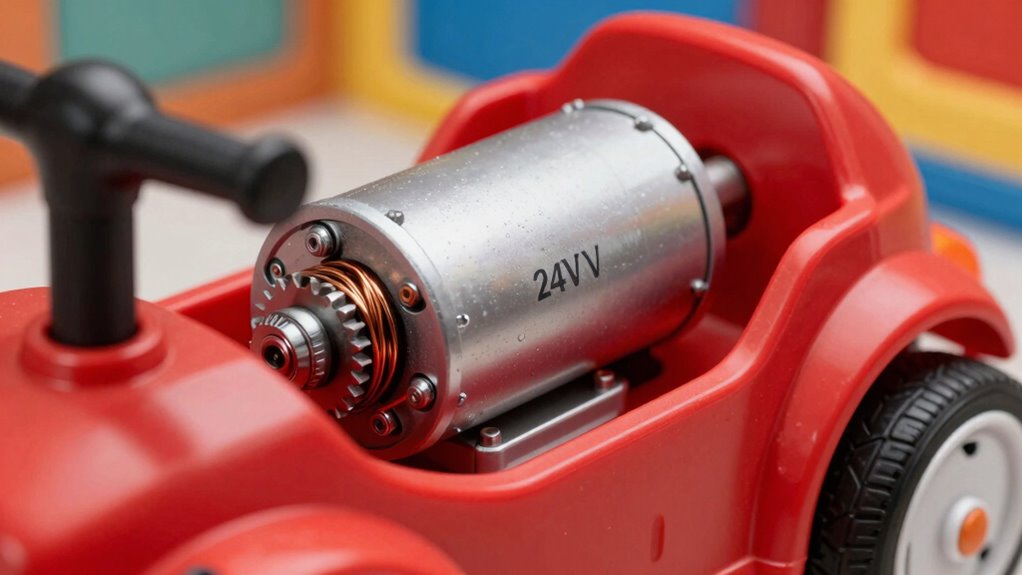
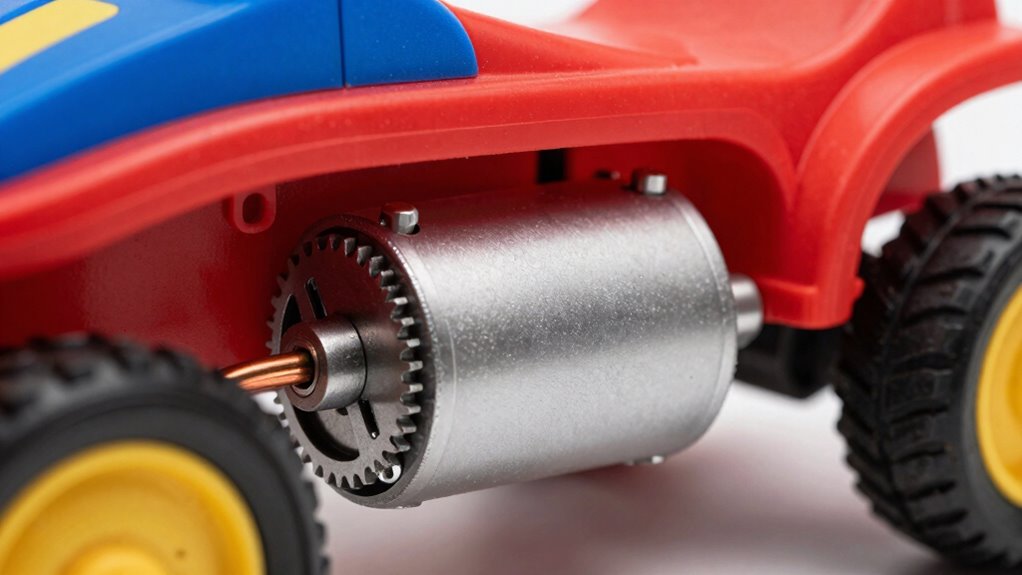
When your 24V ride-on toy starts to lose power or runs less smoothly, it might be time to contemplate changing the motor. The motor is the heart of your toy’s operation, responsible for converting electrical energy into mechanical motion. When it begins to fail or underperform, replacing it can restore your child’s fun and guarantee safe usage. Before doing so, you need to consider battery compatibility—making sure the new motor works seamlessly with the existing power source. Most 24V ride-on toys are designed for a specific voltage, but the motor’s specifications, like current draw and power ratings, can vary. Choosing a motor that matches the original voltage ensures the battery can supply enough power without overloading or underperforming, preventing premature wear or safety hazards. It’s also essential to check if the new motor is compatible in terms of size and mounting points to avoid installation issues.
Safety considerations should be at the forefront of your decision to replace the motor. When installing a new motor, verify that it’s designed for toy use, which means it meets safety standards and is free from defects. Inspect the wiring and connectors for damage or wear, replacing any frayed or corroded parts to prevent shorts or electrical fires. Proper installation is vital—secure all connections tightly and ensure no loose wires can interfere with moving parts. Using the correct tools and following manufacturer instructions minimizes the risk of damaging the toy or creating unsafe conditions. It’s also wise to test the toy in a controlled environment after the motor replacement to confirm everything functions smoothly and safely. Additionally, understanding the importance of safety standards for toy motors can help you select the most appropriate and secure replacement. Regular maintenance and checking for signs of wear can extend the lifespan of the motor and prevent unexpected failures. Recognizing the signs of motor failure early can save you time and money by addressing issues before they become serious problems. Keeping an eye on motor performance can also help detect potential issues before they lead to safety concerns. Furthermore, selecting the right motor can influence the overall performance and durability of the toy, ensuring long-term safe operation.
Replacing the motor isn’t just about restoring power; it’s about maintaining the safety and longevity of the ride-on toy. Guaranteeing battery compatibility means that the motor will operate efficiently without putting undue stress on the electrical system. When weighing safety, double-check that the replacement motor and all associated components are appropriate for children’s toys, avoiding any parts that might overheat or pose choking hazards. Proper maintenance and timely replacement prevent accidents and keep your child’s playtime safe and enjoyable. By paying close attention to these factors, you not only extend the life of the ride-on toy but also give yourself peace of mind knowing it’s safe for your little adventurer. Ensuring proper motor compatibility can significantly impact the overall performance and safety of the toy in the long run.

2 Pcs 24V Powered Wheels Motor Upgrade Gearbox for Ride On Toys 24v RS555 40000RPM High Speed Drive Engine Motor Upgrade Gearbox Replacement Parts
- Powerful 24V Motor Upgrade: High RPM 40000 for fast rides
- Compatible with 24V Motors: Check motor model for fit
- Pack of 2 Gearboxes: Includes two high-speed gearboxes
As an affiliate, we earn on qualifying purchases.
As an affiliate, we earn on qualifying purchases.
Frequently Asked Questions
How Do I Know if My Motor Needs Replacing?
You can tell if your motor needs replacing by noting decreased performance, unusual noises, or if the toy struggles to accelerate. Check the battery lifespan—if your battery is still good but the toy underperforms, the motor might be the issue. Confirm motor compatibility with your toy model; incompatible motors can cause problems. If these signs persist despite charging the battery, it’s likely time to replace the motor for smooth operation.
Can I Upgrade to a More Powerful Motor?
Yes, you can upgrade to a more powerful motor, but you need to take into account the motor specifications first. Check the voltage, current, and size to guarantee compatibility with your ride-on toy. Upgrade options vary from high-torque to higher-voltage motors, which can boost speed and power. Keep in mind that upgrading might also require adjustments to the wiring or gear system for peak performance and safety.
What Safety Precautions Should I Take When Changing the Motor?
Did you know that improper motor upgrades can cause over 50% of ride-on toy failures? When changing the motor, you should prioritize safety by checking battery compatibility to prevent damage. Use the correct tools, like screwdrivers and pliers, to avoid slips or injuries. Always disconnect the battery before starting, wear safety glasses, and follow the manufacturer’s instructions to guarantee a safe and successful upgrade.
How Long Does a Typical Motor Last?
A typical motor in a 24V ride-on toy lasts around 1 to 3 years, depending on usage and maintenance. You can extend its lifespan by performing regular motor maintenance, like cleaning and inspecting connections, and ensuring battery compatibility to prevent strain on the motor. Proper care reduces wear and tear, helping your ride-on toy run smoothly and last longer. Always follow manufacturer guidelines for the best results.
Is It Difficult to Install a New Motor Myself?
Installing a new motor yourself isn’t too difficult if you have the right tools and understand battery compatibility. You’ll need basic tools like screwdrivers and pliers, and make sure the new motor matches the voltage and size of your ride-on toy. Follow the manufacturer’s instructions carefully, disconnect the battery first, and take your time. With patience, you can successfully upgrade your toy’s motor without professional help.
Conclusion
So, now you see how the motor truly transforms a simple ride-on toy into a powerful, responsive vehicle. It’s not just about spinning wheels—it’s about control, speed, and fun. When you understand these changes, you can better appreciate the engineering behind it all. Isn’t it fascinating how a small motor can make such a big difference? Next time your child rides, you’ll know exactly what makes it all tick—and why the motor matters so much.