
Creating a DIY backyard obstacle course designed to boost your steering involves evaluating your yard space, choosing safe, durable materials like cones and tires, and designing challenges that require precise control and quick responses. Incorporate elements like weaving through cones, maneuvering zigzag patterns, and adjusting speed for different obstacles. Regularly monitor your progress and adjust obstacles as your skills improve. Keep safety a top priority, and you’ll find that a well-planned course can greatly enhance your driving skills—discover how to do it step by step.
Key Takeaways
- Incorporate cone weaving and tight turns to enhance steering precision and control during obstacle navigation.
- Use varied obstacle spacing and height to challenge and improve handling skills in different scenarios.
- Include real-world driving cues like traffic signs to train focus and quick response, boosting steering accuracy.
- Regularly monitor and adjust obstacle difficulty to ensure progressive skill development.
- Prioritize safety with stable, impact-absorbing materials to maintain confidence and prevent injuries during steering practice.
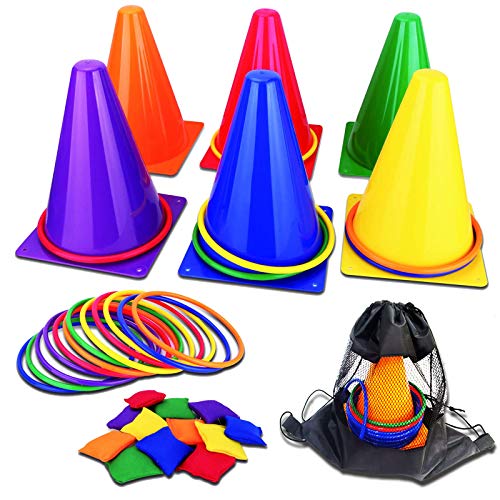
unanscre 31PCS 3 in 1 Carnival Outdoor Games Combo Set for Kids, Soft Plastic Cones Bean Bags Ring Toss Game, Gift for Birthday Party/Xmas
Carnival Outdoor Games Combo Set: Still considering what carnival game to play? unanscre 3 in 1 Carnival Outdoor…
As an affiliate, we earn on qualifying purchases.
As an affiliate, we earn on qualifying purchases.
Why Building a DIY Backyard Obstacle Course Boosts Your Steering Skills
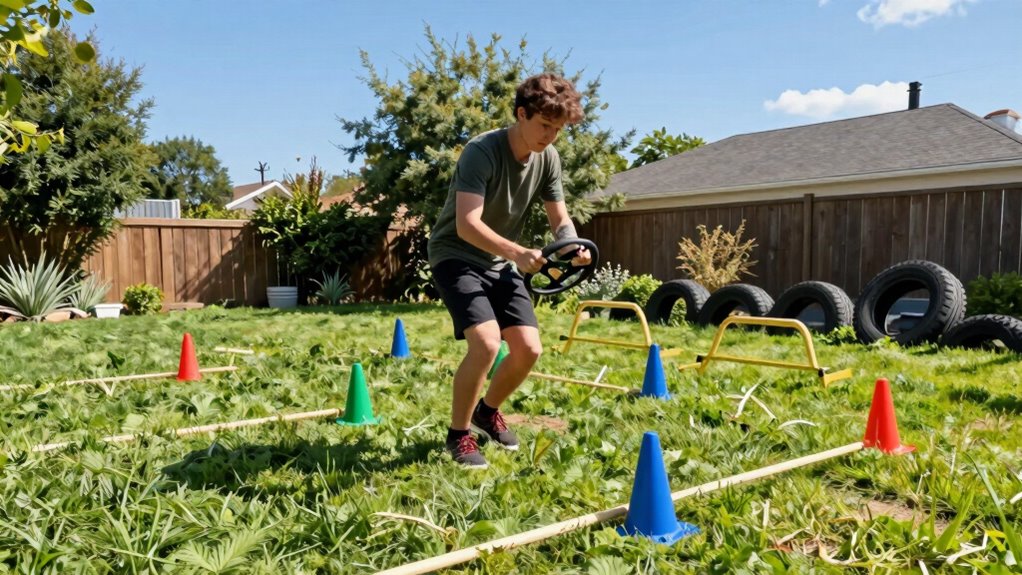
Building a DIY backyard obstacle course is a fun way to improve your steering skills because it requires you to navigate through various obstacles with control and precision. As you set up and practice, you’ll enhance your car handling by learning to make smooth turns and maintain stability. Obstacle navigation challenges you to stay focused and respond quickly to changing conditions, sharpening your reflexes. The more you practice, the better you’ll get at judging distances and controlling your speed. This hands-on experience directly translates to better steering in real driving situations. Additionally, engaging in these activities helps develop your content understanding of vehicle dynamics and handling principles. By repeatedly maneuvering through different obstacles, you develop a stronger sense of your vehicle’s capabilities, making you a more confident and skilled driver overall.

Premium Dog Agility Equipment Set Outdoor Indoor Game, Tire Jump + Hurdle Jump, Tunnel, Weave Poles, Pause Box, 2 Toy Balls, 2 Flying Discs, 1 Whistle, 1 Bag, Backyard Dog Training Obstacle Course Kit
Fun & Health Dog Agility Course Set – Ideal for Backyard Training/ Dog Games Elevate your dog's training…
As an affiliate, we earn on qualifying purchases.
As an affiliate, we earn on qualifying purchases.
How to Evaluate Your Yard Space and Skill Level for the Best Course

Start by measuring your yard to understand any space limitations, so you know what obstacles will fit comfortably. Next, consider the size and type of obstacles that suit your skill level, ensuring they’re challenging but safe. Incorporate elements like fire pits or outdoor ovens to add variety and excitement to your course. Additionally, integrating sound healing elements can enhance focus and relaxation during your activities. Exploring yard space utilization can help you maximize your available area and create a more efficient course. Developing a clear plan will also allow you to select the most appropriate obstacles and features for your specific yard. Understanding the importance of safety considerations ensures that your course remains fun and injury-free. Finally, match your course’s difficulty to your experience to create a fun, achievable challenge for everyone involved.
Assess Yard Space Constraints
Before designing your obstacle course, it’s essential to evaluate your yard’s available space and your own skill level. Start by measuring the total area and noting any garden trees that could serve as natural obstacles or shade. Pay attention to the lawn slope, as uneven terrain can affect safety and challenge level. Flat areas are ideal for beginner courses, while slight slopes can add difficulty for more experienced participants. Consider how much space you have for each obstacle without overcrowding the yard. Be realistic about your skill level and future goals, ensuring the course fits comfortably within your yard’s constraints. This assessment helps you create a safe, engaging course that maximizes your yard’s potential without risking damage or injury. Additionally, understanding your yard’s terrain can help you choose obstacles that are appropriate for the existing landscape and avoid unnecessary modifications. Knowing the natural landscape features can also inspire creative obstacle ideas that integrate seamlessly with your yard. Moreover, evaluating your power supply options ensures your obstacles and safety equipment operate reliably during use. Evaluating your electricity access is also crucial if your course includes electronic or motorized components to ensure safety and functionality. Being aware of potential utility interference can help prevent technical issues during your activities.
Determine Obstacle Dimensions Needed
Once you’ve assessed your yard’s space and identified any obstacles or slopes, it’s time to determine the dimensions needed for each obstacle. Measure the available area carefully, considering obstacle spacing to prevent crowding and ensure safety. Keep in mind that material thickness affects stability and durability, so choose appropriate materials based on your skill level and course complexity. Use the table below to plan obstacle sizes, spacing, and material considerations:
| Obstacle Type | Dimensions (Length/Height) | Material Thickness | Spacing Recommendations |
|---|---|---|---|
| Balance Beam | 8–12 ft / 4–6 in | 1–2 in | 2–3 ft apart |
| Crawl Tunnel | 4–6 ft / 1–2 ft | 0.5–1 in | 3–4 ft apart |
| Tire Run | 10–15 ft | 0.5–1 in | 2–3 ft apart |
| Jump Box | 2–3 ft / 1–2 ft | 1–2 in | 2 ft between boxes |
| Climbing Wall | 4–6 ft / 3–4 ft | 1–2 in | 3–4 ft apart |
Additionally, considering safety guidelines and adjusting these dimensions based on your yard and skill level will help create the safest, most effective course.
Match Course Difficulty Level
Evaluating your yard space and skill level is essential to designing a safe and enjoyable obstacle course. Start by appraising the available area, making sure there’s enough room for each obstacle without crowding. Consider your skill level to determine appropriate challenge levels—avoid obstacles that are too difficult or too easy. Maintaining theme consistency throughout the course keeps it visually appealing and engaging, but safety considerations should always come first. Make certain obstacles are sturdy, stable, and suitable for the participants’ age and ability. Adjust the difficulty by varying obstacle heights, spacing, or complexity to match your skills and yard size. Additionally, paying attention to noise reduction solutions can help minimize disruptions during active play. Incorporating knowledge about safety precautions ensures that you create a risk-aware environment for all participants. By understanding the horsepower of electric dirt bikes, you can also incorporate fun and dynamic features that challenge steering skills. Considering proper soil for string of hearts plants can be useful if you plan to include natural elements or garden features as part of your course. Understanding how dreams of deceased loved ones can influence emotional well-being might help in creating an environment that feels both safe and uplifting. Striking the right balance ensures fun while minimizing the risk of injury, creating a course that’s both exciting and safe.

Dog Agility Course Backyard Set,Dog Agility Equipment, Dog Obstacle Course Backyard With 2-Set Agility Hurdle ,Jump Ring, 8 Weave Poles, Tunnel, Pause Box, Toy Balls And 2 Portable Carrying Bags
RUGGED & STURDY:Our product is durability, the training pole is made of ABS material,which is safe and sturdy,that…
As an affiliate, we earn on qualifying purchases.
As an affiliate, we earn on qualifying purchases.
Choosing Safe, Effective Materials to Improve Your Driving Precision

When selecting materials for your obstacle course, prioritize durability and safety to prevent accidents and guarantee long-lasting use. Look for cost-effective options that still meet safety standards, so you can build confidently without overspending. Choosing the right materials helps you improve your driving precision while keeping the setup safe and affordable. Incorporating well-structured content into your design process ensures the course remains engaging and effective for skill development. Additionally, understanding auditory processing can help in designing courses that also challenge auditory and sensory skills for a comprehensive training experience. Recognizing the importance of reliable cloud services can further influence your planning, especially if you utilize digital tools for design and training management. Furthermore, selecting materials with accurate color reproduction can aid in better visibility and differentiation of course elements, enhancing safety and clarity during training. Incorporating essential oils like peppermint oil into your course environment can create a refreshing atmosphere that may help keep participants alert and focused.
Material Durability and Safety
Choosing the right materials for your backyard obstacle course is essential for both safety and durability. Your material selection should prioritize high-quality, weather-resistant options to withstand outdoor conditions and frequent use. Use sturdy, impact-absorbing materials like thick foam padding or rubber mats to minimize injury risks. Always follow safety protocols during installation, ensuring all components are securely anchored and free from sharp edges or splinters. Avoid fragile or easily worn materials that could break or degrade over time, creating hazards. Regularly inspect your course for wear and tear, replacing damaged parts promptly. Incorporating proper maintenance practices helps extend the lifespan of your materials and maintain safety standards. Additionally, selecting materials with tested safety ratings ensures they meet safety standards and reduce the risk of accidents. By choosing durable, safe materials and adhering to safety protocols, you’ll build an obstacle course that remains reliable and safe, helping you improve your steering skills without unnecessary risks.
Cost-Effective Choices
To maximize your budget while enhancing your driving skills, focus on selecting materials that are both affordable and effective at improving your precision. Start with a thorough cost analysis to identify budget-friendly options that don’t compromise safety or quality. Use simple, readily available materials like tires, cones, or plywood, which are inexpensive yet versatile. Incorporate budget planning to allocate funds efficiently, prioritizing items that offer the best value for steering practice. Avoid costly equipment that may inflate expenses without adding significant benefit. Opting for durable, safe materials ensures longevity and minimizes replacement costs. By carefully balancing cost analysis with practical needs, you can build an obstacle course that’s both affordable and impactful for sharpening your driving accuracy.
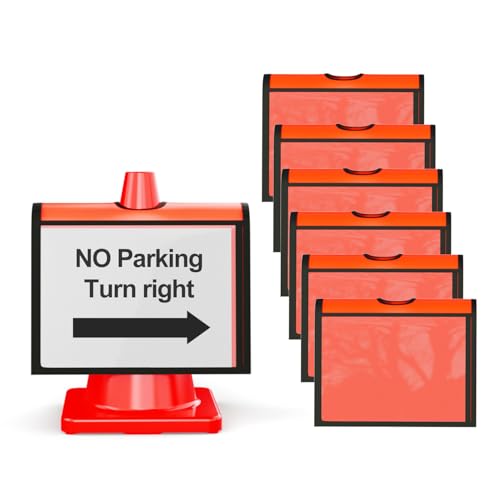
HiGiant 6 Pcs Traffic Cone Sleeve with Pockets for Caution, Safety Message Signs Cone Cover for Outdoor Activity Warning, Sports Training
Pocket Design: the safety cones sleeve has a clear pocket design which can be loaded with A4 paper…
As an affiliate, we earn on qualifying purchases.
As an affiliate, we earn on qualifying purchases.
Designing Obstacles That Challenge Balance, Coordination, and Steering
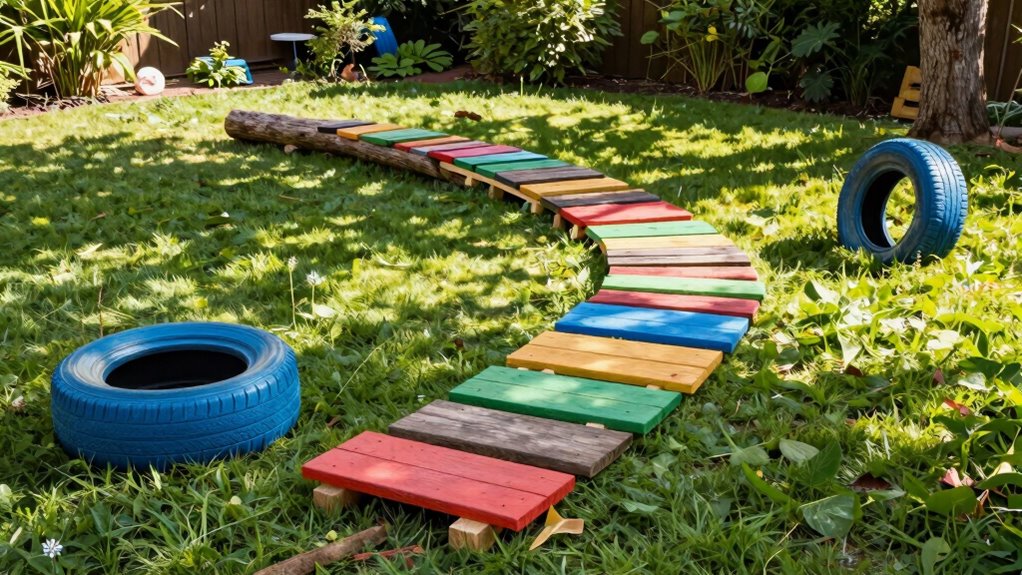
Creating obstacles that test balance, coordination, and steering requires careful planning to guarantee they’re both challenging and safe. Focus on designing layouts that promote smooth traffic flow, preventing bottlenecks or congestion. Place obstacles in a sequence that naturally guides participants, encouraging continuous movement without confusion. To enhance obstacle aesthetics, choose colorful, visually appealing materials that motivate users and blend well with your backyard environment. Incorporate elements like balance beams, wobble boards, or tightropes to challenge stability, while ensuring surfaces are slip-resistant. Keep safety in mind by spacing obstacles appropriately and avoiding sharp edges. Well-designed obstacles will not only improve steering skills but also create an engaging, enjoyable experience that keeps everyone safe and entertained.
Step-by-Step: Setting Up Your Backyard Obstacle Course at Home

Setting up your backyard obstacle course begins with planning the layout and gathering materials. Think about the space you have and how to incorporate traffic signs and obstacle markers effectively. Start by sketching your course to visualize the flow and challenge points. Gather supplies like cones, ropes, old tires, and sturdy stakes. Use traffic signs to add visual cues and create realistic navigation challenges. Mark obstacle zones with obstacle markers or flags so you can easily adjust or move them later. Arrange items in a logical sequence, ensuring enough room for safe movement. Remember, safety is key—make sure the obstacles are stable and spaced appropriately. With a clear plan and the right materials, you’ll be ready to build an engaging and effective obstacle course that boosts steering skills.
How to Incorporate Steering Challenges and Drills Into Your Course

Incorporating steering challenges and drills into your backyard obstacle course can markedly improve navigation skills and spatial awareness. Use traffic signs, like stop, yield, and directional arrows, to simulate real-world driving scenarios. These signs help you practice steering with purpose, requiring quick decisions and precise movements. To make challenges more realistic, consider weather considerations such as wind or rain, which can affect traction and visibility. Incorporate drills like weaving through cones while looking for traffic signs or adjusting your speed based on weather cues. These activities challenge your control, reaction time, and adaptability. By integrating traffic signs and weather-based obstacles, you’ll develop more intuitive steering skills that translate effectively to everyday driving or biking.
How to Track Your Progress and Adjust Your Course as You Improve

Tracking your progress is essential to guarantee your backyard obstacle course remains challenging and effective as you improve. You want to see how your obstacle design and course layout evolve with your skills. To do this, record your times and note where you struggled or excelled. Revisit your course regularly and compare your performance. Adjust the obstacle design by increasing difficulty or changing the layout to keep it fresh. Consider:
- Moving obstacles to different positions for variety
- Adding new challenges as you improve
- Simplifying sections if needed for balance
- Tracking your time improvements over weeks
This helps you stay motivated and makes certain your course continues to challenge your steering skills. Regular assessment keeps your course dynamic and aligned with your progress.
Tips for Keeping Your Course Safe and Maintaining It Over Time

Keeping your backyard obstacle course safe and well-maintained is key to enjoying it regularly and preventing accidents. Regularly inspect for damage caused by weather conditions, such as loose bolts, splintered wood, or rust, and repair or replace parts promptly. Pay attention to obstacle aesthetics—overgrown plants, dirt buildup, or faded materials can make components unsafe or less inviting. Clear debris and ensure all surfaces are stable and secure, especially after heavy rain or wind. Keep pathways clear and avoid slippery spots. Regularly tighten fasteners, repaint or treat materials to prevent deterioration, and check for sharp edges. Proper upkeep guarantees your course remains safe, visually appealing, and durable, allowing you to focus on steering improvements while enjoying your backyard adventure.
Extra Resources and Creative Ideas to Make Your Course More Fun and Effective

To make your backyard obstacle course more fun and effective, explore a variety of extra resources and creative ideas. Adding garden decor can enhance the visual appeal and inspire creativity, making the course more engaging. Incorporate outdoor lighting to extend playtime into the evening and improve visibility. You might also consider using colorful cones or flags to mark different sections, boosting excitement and clarity. For an extra challenge, add themed elements like tunnels or balance beams inspired by your favorite stories or sports. Ultimately, listen to kids’ ideas; their input can spark innovative twists that keep the course fresh and fun. These ideas help create an inviting environment that encourages active play while improving steering skills.
Frequently Asked Questions
What Is the Ideal Age Range for Participating in This Obstacle Course?
You should consider the ideal age range for this obstacle course as children between 4 and 12 years old. During this time, kids have the agility and coordination to navigate safely. Always prioritize child safety by ensuring adult supervision at all times, especially for younger children. Adjust the difficulty level of the obstacles as needed, and make sure safety gear is used to prevent injuries and keep the experience fun and safe.
How Long Does It Typically Take to See Improvement in Steering Skills?
You’ll typically see motor skill progression within a few weeks of consistent practice, as long as you stay committed. The key is practice consistency; regularly maneuvering the obstacle course helps improve steering skills faster. With dedication, you might notice better control and coordination in just a few sessions, but ongoing practice is essential for sustained improvement. Keep at it, and your steering skills will keep getting sharper over time.
Can This Course Be Adapted for Individuals With Physical Disabilities?
Yes, you can adapt this obstacle course for individuals with physical disabilities by incorporating adaptive modifications and accessibility considerations. You might add ramps, wider pathways, or lower obstacles to accommodate different mobility aids. Guarantee surfaces are non-slip and provide supportive handrails where needed. Customizing the course makes it inclusive, allowing everyone to develop steering skills while enjoying the activity comfortably and safely.
What Are Budget-Friendly Alternatives for High-Quality Materials?
Budget-friendly options boost your backyard’s brilliance by repurposing materials creatively. You can transform old tires into tire runs, use recycled wood for ramps, or repurpose plastic bottles as markers. These budget-friendly options save money and promote sustainability. By thinking outside the box, you’ll find plenty of inexpensive, effective materials that make your obstacle course unique, fun, and functional without breaking the bank.
How Often Should the Course Be Rearranged or Updated?
You should update your obstacle course every few months to keep it fresh and challenging. Follow a maintenance schedule that includes regular safety inspections to identify wear and tear, loose parts, or hazards. Rearranging the course weekly or bi-weekly maintains participant engagement and prevents boredom. Always prioritize safety by checking for stability and damage during inspections, especially after storms or heavy use, to ensure everyone stays safe while having fun.
Conclusion
Building your backyard obstacle course isn’t just about fun or challenge—it’s about sharpening your steering skills in a safe, controlled environment. While the obstacles may seem playful, they reveal your true driving precision and coordination. As you refine your course, you’ll notice improvements on the road, turning a simple project into a powerful training tool. Embrace the balance between challenge and safety, and watch your control grow as effortlessly as your creativity.