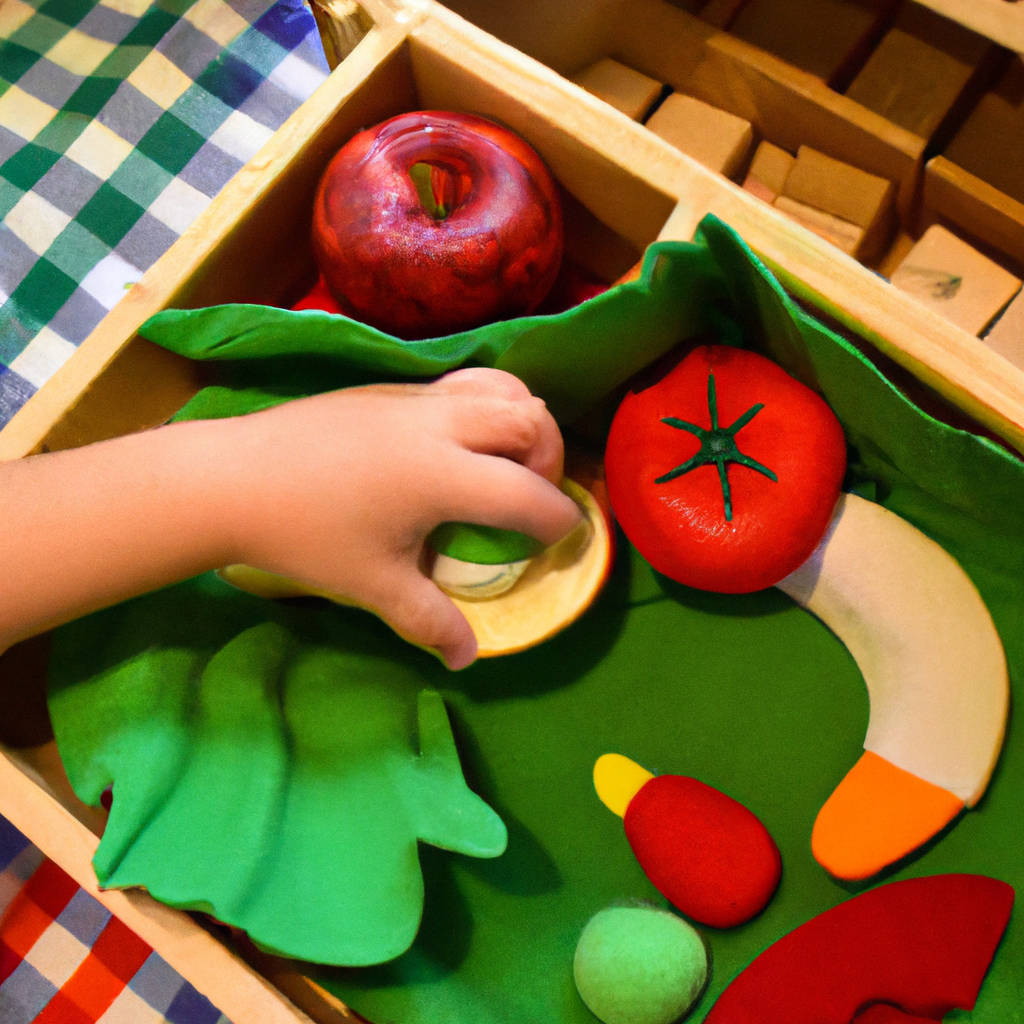
Making Montessori toys for my child brings me great happiness, and one of my favorite things to create is playfood. This activity is not only enjoyable and engaging, but it also helps develop important skills like creativity, fine motor skills, and language development.
In this article, I’ll guide you through the process of making your own playfood using simple materials and tools. From choosing the right materials to incorporating educational elements, I’ll share all the steps and tips you need to create realistic and educational playfood sets for your little one.
Key Takeaways
- Safety and durability are important considerations when choosing materials for playfood Montessori toys
- Opt for eco-friendly and non-toxic options like wood, fabric, and organic cotton
- Design playfood to be visually appealing and engaging, considering color and texture choices
- Consider the developmental needs and abilities of children when planning and designing playfood

Wooden Play Food Sets for Kids Kitchen Accessories, Montessori Educational Toys Food, Pretend Play Food for Toddlers, Velcro Fruits and Vegetables Cutting Set for Kids Boys Girls
- Complete Wooden Play Food Set: 32 pieces including food, knives, and accessories
- Realistic Cutting Experience: Includes wooden knives and Velcro for pretend slicing
- Educational and Color Recognition: Helps kids learn colors, shapes, and counting
As an affiliate, we earn on qualifying purchases.
As an affiliate, we earn on qualifying purchases.
Choosing the Right Materials
When choosing the right materials for playfood Montessori toys, it’s important to consider their safety and durability.
As a parent, I want to ensure that the materials used in my child’s toys are eco-friendly and non-toxic. Opting for natural materials like wood, fabric, and organic cotton can be a great choice. These materials are not only safe for children but also have a minimal impact on the environment. Additionally, they tend to be more durable, making them a cost-effective option in the long run.
Wooden playfood, for example, can withstand rough play and last for years. By choosing eco-friendly and durable materials, we can create playfood Montessori toys that are both safe for our children and sustainable for the planet.
Now, let’s move on to planning your playfood designs.
Planning Your Playfood Designs
When it comes to planning your playfood designs, two key points to consider are color and texture choices, as well as designing for different ages.
For color and texture choices, it’s important to select materials that are visually appealing and engaging for children, such as bright colors and varied textures.
Additionally, designing for different ages involves considering the developmental needs and abilities of children at various stages, ensuring that the playfood is safe, age-appropriate, and offers opportunities for learning and imaginative play.
Color and Texture Choices
Choosing the right colors and textures is important when making playfood Montessori toys. The fabric choices can greatly impact the sensory development of children. Here are some considerations to keep in mind:
- Soft and smooth fabrics like fleece can mimic the texture of real food, enhancing the sensory experience.
- Using different patterns and colors can make the playfood more visually appealing and engaging for children.
- Incorporating different textures, such as ribbons or buttons, can provide additional tactile stimulation.
- Opting for washable fabrics ensures easy maintenance and cleanliness.
- Choosing fabrics that are hypoallergenic and free from harmful chemicals is crucial for the safety of children.
By carefully selecting the colors and textures of the playfood, we can create an immersive and stimulating play experience for children.
Now, let’s move on to designing for different ages, where we can explore ways to tailor the toys to specific developmental stages.
Designing for Different Ages
To create age-appropriate designs, consider incorporating different features and elements that cater to the developmental needs of children. Age-appropriate designs are crucial in promoting the overall development of children.
For younger children, focus on designs that stimulate their senses, such as bright colors, different textures, and easy-to-grasp shapes.
As children grow older, their cognitive and motor skills develop, so consider incorporating more complex designs that encourage problem-solving and fine motor skills. Interactive elements like buttons or knobs can also enhance their learning experience.
Additionally, consider the size and weight of the toys to ensure safety and ease of use. By designing toys that align with children’s developmental milestones, you can provide them with the necessary challenges and stimulation to promote their growth and learning.
Now, let’s move on to gathering the necessary tools for creating these age-appropriate playfood Montessori toys.
Gathering the Necessary Tools
First, gather all the necessary tools for making your playfood Montessori toys. Planning the playfood designs and sourcing the fabric or felt are crucial steps in creating these educational toys. To ensure a successful crafting session, make sure you have the following items at hand:
| Tools | Materials | Accessories |
|---|---|---|
| Scissors | Fabric or felt | Sewing thread |
| Sewing machine | Stuffing | Pins |
| Needle |
Having these tools ready will make the process smoother and more enjoyable. When planning the playfood designs, consider the age group you are targeting and choose appropriate shapes and colors. Sourcing fabric or felt can be done at local craft stores or online. Look for materials that are safe for children, easy to clean, and durable. Once you have gathered all the necessary tools, you can move on to preparing the fabric or felt, ensuring they are ready for cutting and sewing.
Transitioning into the next section, let’s now focus on preparing the fabric or felt for your playfood Montessori toys.
Preparing the Fabric or Felt
When it comes to making playfood Montessori toys, one of the key aspects to consider is the choice of fabric or felt. There are various options available, such as cotton, fleece, or wool felt, each with their own pros and cons in terms of durability and texture.
Once you have selected the material, the next step is cutting and shaping the fabric or felt into the desired shapes and sizes, ensuring precision and accuracy.
Fabric or Felt Options
There’s a wide range of fabric or felt options available for making Montessori playfood toys. When choosing the right fabric, it’s important to consider the durability and safety of the material. Opt for fabrics that are easy to clean, such as cotton or polyester blends, as playfood toys are prone to spills and stains.
Felt is also a popular choice for its softness and ease of use. When hand sewing felt playfood, make sure to use a strong thread and double or triple stitch the seams to prevent unraveling. Additionally, using contrasting colors for the stitching can add a decorative touch to the finished toys.
Now that we have our fabric or felt ready, let’s move on to the next step of cutting and shaping the playfood.
Cutting and Shaping
Once you have chosen the right fabric or felt, it’s time to start cutting and shaping the pieces for your playfood. Here are some cutting techniques and shaping tools that will help you create realistic and engaging playfood:
-
Scissors: Invest in a good pair of fabric scissors that are sharp and comfortable to hold. These will be your go-to tool for cutting out the shapes of your playfood items.
-
Templates: Use templates or stencils to trace the outline of the food item onto the fabric or felt. This will ensure that all your pieces are uniform in size and shape.
-
Cutting mats: Place your fabric or felt on a cutting mat to protect your work surface and provide a stable base for cutting.
-
Pinking shears: These special scissors have zigzag edges that help prevent fraying. They are great for cutting out fabric shapes that don’t require a smooth edge.
-
Rotary cutters: If you are working with thick or multiple layers of fabric, a rotary cutter can make cutting easier and more precise.
Now that you have your pieces cut and shaped, it’s time to move on to the sewing techniques for assembling your playfood.
Sewing Techniques
Now that you’ve got your pieces all cut and shaped, it’s time to learn some sewing techniques to put your playfood together.
Sewing is a crucial step in creating realistic and durable playfood for your little ones. There are a few basic stitches you can use for this project.
The running stitch is perfect for joining two pieces of fabric together. Simply insert the needle through the fabric and pull it through, repeating the process until the two pieces are securely attached.
If you want to add some decorative details, embroidery techniques can be used. The backstitch is ideal for outlining shapes or adding intricate designs.
With these sewing techniques, you’ll be able to bring your playfood to life.
Now, let’s move on to cutting and sewing the playfood shapes.
Cutting and Sewing the Playfood Shapes
To start cutting and sewing the playfood shapes, you’ll need a sharp pair of scissors and a needle with thread. Here are three important things to keep in mind when working on this step:
-
Choose the right fabric: Look for fabrics that are durable and easy to work with, such as cotton or felt. Avoid fabrics that fray easily or have loose threads.
-
Trace and cut the shapes: Use a stencil or template to trace the desired shapes onto the fabric. Then, carefully cut along the lines using sharp scissors. Take your time to ensure clean and precise cuts.
-
Use proper sewing techniques: When sewing the shapes together, make sure to use small and even stitches. Double knot the thread at the beginning and end to secure the stitches. Take care to align the edges properly and sew with a consistent seam allowance.
Now that you have your playfood shapes sewn, it’s time to move on to the next step of stuffing and assembling the playfood without delay.
Stuffing and Assembling the Playfood
After sewing the playfood shapes, it’s important to stuff and assemble them carefully.
Choosing the right stuffing is crucial to achieving the desired texture and appearance of the playfood. I recommend using polyester fiberfill, as it is soft, lightweight, and machine washable.
To stuff the playfood, start by gently pushing small amounts of stuffing into the corners and edges using your fingers or a chopstick. Avoid overstuffing, as it can make the playfood look lumpy or misshapen.
As for assembling, make sure all the seams are properly aligned before sewing them closed. Use a ladder stitch to invisibly close the openings, ensuring a neat and professional finish.
By following these best practices for stuffing and assembling, your playfood will be durable and realistic.
Now let’s move on to adding details and embellishments to bring the playfood to life.
Adding Details and Embellishments
When it comes to enhancing sensory play and exploring creative design possibilities, there are a few key points to consider.
First, adding different textures, such as soft fabrics or rough materials, can provide a tactile experience for children.
Second, incorporating various colors and patterns can stimulate visual senses and spark imagination.
Finally, including interactive elements, such as buttons or zippers, can engage fine motor skills and encourage hands-on exploration.
Enhancing Sensory Play
Explore different textures and materials to create sensory-rich playfood Montessori toys.
Sensory play is crucial for a child’s development, as it stimulates their senses and helps them make sense of the world around them. By incorporating various textures, such as soft fabric for bread or rough felt for vegetables, you can engage their sense of touch and enhance their sensory development.
Additionally, using different materials like wood, plastic, or metal can provide a range of sensory experiences. This type of play also promotes the development of fine motor skills, as children manipulate the playfood and engage in imaginative play.
By offering a variety of textures and materials, you can create a sensory-rich environment that encourages exploration and learning.
Now, let’s move on to the exciting possibilities for creative design!
Creative Design Possibilities
Now that we have explored the importance of enhancing sensory play, let’s dive into the creative design possibilities when making playfood Montessori toys.
One of the great things about designing your own playfood is that you can use recycled materials to bring your creations to life. From cardboard boxes to fabric scraps, the possibilities are endless. You can repurpose old packaging or use fabric remnants to create realistic-looking fruits, vegetables, and even baked goods.
There are also countless DIY playfood tutorials available online that provide step-by-step instructions on how to make specific items. These tutorials often include templates, measurements, and techniques for achieving lifelike textures and patterns. By experimenting with different materials and following these tutorials, you can create playfood that looks just like the real thing.
Creating Realistic Textures and Patterns
To create realistic textures and patterns for your playfood Montessori toys, you can use materials like fabric scraps, textured paper, and paint. These simple materials can bring your playfood to life and enhance your child’s sensory experience.
Here are three ways to create unique textures and experiment with different patterns:
-
Fabric Scraps: Cut fabric scraps into small pieces and attach them to your playfood using fabric glue or stitching. This will give your toys a tactile feel and add depth to their appearance.
-
Textured Paper: Look for textured paper at your local craft store or create your own by crumpling regular paper and then smoothing it out. Use this paper to wrap your playfood, creating interesting patterns and textures.
-
Paint: Experiment with different painting techniques to add texture and patterns to your playfood. Use sponges, brushes, or even your fingers to create unique designs that mimic the look of real food.
By incorporating these techniques, you can create playfood that not only looks realistic but also engages your child’s senses.
Now, let’s explore how to incorporate educational elements into your playfood Montessori toys.
Incorporating Educational Elements
You can easily enhance the educational value of your playfood creations by incorporating elements that promote learning and development. By incorporating sensory play and promoting imaginative play, you can provide a rich and engaging experience for children. One way to achieve this is by creating playfood sets that represent different food groups or cultural cuisines. This allows children to learn about nutrition and diverse cultures while engaging in pretend play. Another educational element you can incorporate is a variety of textures and patterns in your playfood creations. This helps develop sensory skills and encourages exploration. For example, you can make a soft felt strawberry or a crinkly potato chip. By including these elements in your playfood toys, you can create an immersive and educational play experience for children.
| Educational Elements | Benefits |
|---|---|
| Representing food groups | Learn about nutrition |
| Cultural cuisines | Culturally diverse learning |
| Textures and patterns | Sensory development |
| Pretend play | Imagination and creativity |
With these educational elements, children can learn while having fun with their playfood creations. Now, let’s move on to the next section about making playfood sets and collections.
Making Playfood Sets and Collections
When creating sets and collections of playfood, consider incorporating a variety of food groups and cultural cuisines to provide a diverse and engaging play experience. This not only exposes children to different types of food but also helps them learn about nutrition and cultural diversity.
Here are some ideas to consider:
- Include fruits, vegetables, grains, proteins, and dairy products to represent different food groups.
- Incorporate foods from various cultures such as sushi, tacos, pasta, and curry to introduce children to different cuisines.
- Use DIY playfood tutorials to create realistic and interactive playfood items. This allows children to actively participate in making their own playfood and enhances their sensory and fine motor skills.
Storing and Organizing Playfood Toys
Storing and organizing playfood toys can be made easier by using clear bins or containers. Not only does this help keep everything in one place, but it also allows for easy visibility of the toys.
To maximize storage space for playfood toys, I recommend using DIY storage solutions. One idea is to repurpose empty shoeboxes by cutting them in half and covering them with colorful wrapping paper. These can serve as individual compartments for different types of playfood.
Another option is to use hanging shoe organizers with clear pockets, which can be hung on the back of a door or on a wall. This allows for easy access and keeps the toys off the floor.
By utilizing these storage solutions, you can keep your playfood toys organized and maximize your storage space.
When it comes to cleaning and maintaining playfood toys… (transition to the next section).
Tips for Cleaning and Maintaining Playfood Toys
Cleaning and maintaining playfood toys can be made easier by wiping them down with a damp cloth after each use. This simple step helps to remove any dirt, food particles, or germs that may have accumulated during playtime.
It is important to pay special attention to any crevices or hard-to-reach areas where debris can hide. For a deeper clean, you can also wash the playfood toys in warm, soapy water. Rinse them thoroughly and allow them to air dry before returning them to the play area.
Regular cleaning not only keeps the toys looking fresh and inviting, but it also helps to ensure the safety and hygiene of your child. By following these cleaning tips and maintenance suggestions, you can keep your playfood toys in great condition for years to come.
Frequently Asked Questions
How Long Does It Take to Make a Playfood Montessori Toy?
It takes about 2-3 hours to make a playfood Montessori toy. However, with some time-saving tips and alternative materials, it can be done quicker.
For example, using pre-cut fabric and patterns can save time on measuring and cutting. Additionally, using felt or foam instead of fabric can be easier to work with and requires less sewing.
Overall, the time it takes depends on your skill level and the complexity of the toy design.
Can I Use Different Materials for Stuffing the Playfood?
Sure, you can definitely use different materials for stuffing playfood toys. Some popular alternatives to traditional stuffing include polyester fiberfill, cotton batting, and even recycled materials like fabric scraps or shredded paper.
When choosing the best materials for stuffing, it’s important to consider factors such as durability, washability, and safety. Make sure to select materials that are non-toxic and hypoallergenic to ensure the safety of children who will be playing with the toys.
Is It Necessary to Use a Sewing Machine for Cutting and Sewing the Playfood Shapes?
Using hand stitching for playfood shapes is a great alternative if you don’t have access to a sewing machine. It may take a bit more time and effort, but the results can still be just as wonderful.
You can use a simple needle and thread to cut and sew the playfood shapes. Just make sure to take your time and be precise with your stitches.
It’s a fun and practical way to create your own Montessori toys!
Can I Use Paint or Markers to Add Details and Embellishments to the Playfood?
Yes, you can definitely use fabric paint or markers to add details and embellishments to your playfood toys. Fabric paint is a great option as it is specifically designed for fabric and will adhere well. You can use it to create patterns, designs, and even add some texture to your playfood.
If you prefer, you can also explore other embellishment options such as embroidery, fabric appliques, or even using small fabric scraps to create different textures on your playfood. The possibilities are endless!
Are There Any Safety Considerations When Making Playfood Toys for Young Children?
When making playfood toys for young children, it’s important to consider their safety. As parents, we want to ensure that the toys we create are age-appropriate and free from any potential hazards.
This means avoiding small parts that can be swallowed, using non-toxic materials, and securely attaching any embellishments. Safety should always be our top priority when crafting playfood toys, so that our little ones can enjoy them without any worries.
Conclusion
Creating playfood Montessori toys is a delightful and rewarding experience. By carefully selecting materials, planning designs, and using the right tools, you can bring these toys to life.
Preparing the fabric or felt and cutting and sewing the shapes will allow you to showcase your creativity. Incorporating educational elements will make these toys both fun and educational for children.
Don’t forget to make sets and collections for added excitement. And remember, storing and organizing these toys will help keep them in mint condition. Lastly, maintaining and cleaning them regularly will ensure their longevity.
Start your playfood toy-making journey today and enjoy the joy it brings!