As a caregiver or educator, I understand the importance of keeping preschool toys clean and free from germs. It’s important to acknowledge that these toys can easily become breeding grounds for bacteria and viruses, putting our young children at risk.
That’s why I’m here to share with you the ultimate guide on how to disinfect preschool toys. From choosing the right disinfectant to step-by-step instructions, I’ll provide you with evidence-based techniques to ensure a safe and healthy play environment.
Say goodbye to germs and hello to peace of mind!
Key Takeaways
- Regular disinfection is important to prevent the spread of illnesses among children.
- Choosing the right disinfectant for preschool toys is crucial, taking into consideration factors like toy material, frequency of use, and specific pathogens.
- Thoroughly washing toys with soap and water before applying a disinfectant is effective in cleaning them.
- Utilizing natural disinfectants that are free from harsh chemicals and toxins is recommended to ensure both cleanliness and safety.
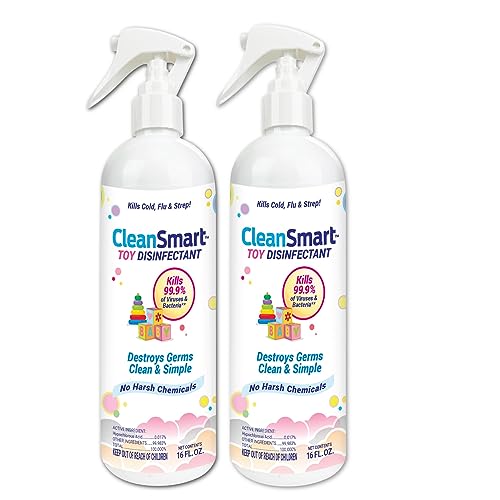
CleanSmart Toy Disinfectant, Hypochlorous Acid Spray, 16 oz (2 pack)
- Effective Sanitizer for Day Care: Approved for all 50 states
- Gentle, Rinse-Free Formula: Leaves no harsh residue
- Versatile for Play Areas: Sanitizes toys, carriers, strollers, and car seats
As an affiliate, we earn on qualifying purchases.
As an affiliate, we earn on qualifying purchases.
Importance of Disinfecting Preschool Toys
Disinfecting preschool toys is crucial for maintaining a safe and healthy environment. As a preschool teacher, I understand the importance of ensuring that the toys in our classroom are free from harmful germs and bacteria. Not only does regular disinfection help prevent the spread of illnesses among the children, but it also promotes overall cleanliness and hygiene.
Choosing appropriate disinfectants is key in effectively eliminating germs from the toys. There are a variety of options available, including bleach solutions, alcohol-based sprays, and disinfectant wipes. It is essential to select a disinfectant that is safe for children and does not leave any harmful residue on the toys. Reading the labels and following the instructions for use is vital to ensure that the disinfectant is being used correctly.
The potential risks of not disinfecting toys cannot be ignored. Preschoolers have developing immune systems, and their close interactions with toys make them more susceptible to infections. Failure to disinfect toys regularly can lead to the spread of illnesses such as colds, flu, and stomach bugs among the children. Additionally, dirty toys can harbor bacteria and allergens that may trigger asthma or allergies in sensitive individuals.
In the subsequent section, I will discuss the importance of choosing the right disinfectant for preschool toys, as this decision plays a significant role in maintaining a safe and healthy environment for the children.
Choosing the Right Disinfectant for Preschool Toys
When it comes to maintaining a safe and hygienic environment in preschools, choosing the right disinfectant for preschool toys is of utmost importance. Safe disinfectant options not only ensure the effectiveness of toy cleaning but also prioritize the well-being of children.
In order to establish best disinfection practices, it is crucial to consider factors such as the type of toy material, the frequency of use, and the presence of any specific pathogens.
Safe Disinfectant Options
There are several safe disinfectant options you can use to clean preschool toys.
When it comes to proper disinfectant selection, it is important to choose products that are effective against a wide range of germs and viruses.
One option is using a bleach solution, which is effective in killing germs on hard surfaces.
Another option is using hydrogen peroxide, which is an environmentally friendly alternative to bleach. It is important to dilute the hydrogen peroxide properly to ensure its effectiveness.
Additionally, alcohol-based disinfectants can also be used to clean toys, as they are effective in killing many types of germs.
Remember to always follow the instructions on the product label and allow the toys to air dry after disinfecting.
Now that we have discussed safe disinfectant options, let’s move on to effective toy cleaning.
Effective Toy Cleaning
To effectively clean your child’s playthings, make sure to thoroughly wash them with soap and water before applying a disinfectant. This will remove dirt, grime, and any visible debris from the toys.
After washing, follow these cleaning methods to ensure a thorough disinfection process:
-
Use natural disinfectants: Natural options like vinegar, hydrogen peroxide, and essential oils can effectively kill germs without harsh chemicals. Dilute the disinfectant according to instructions and apply it to the toys using a spray bottle or cloth.
-
Pay attention to high touch areas: Focus on cleaning and disinfecting areas that are frequently touched, such as handles, buttons, and surfaces that come into direct contact with your child’s hands or mouth.
-
Allow sufficient contact time: Let the disinfectant sit on the toys for the recommended contact time specified on the product label. This will ensure that the germs are effectively killed.
By following these cleaning methods and utilizing natural disinfectants, you can ensure that your child’s toys are thoroughly cleaned and safe for play.
Now, let’s move on to the best disinfection practices for preschool toys.
Best Disinfection Practices
The best way to ensure a thorough clean is by using natural disinfectants and following the recommended contact time. When it comes to choosing eco-friendly disinfectants, it is important to look for products that are free from harsh chemicals and toxins. Opting for natural alternatives such as vinegar, hydrogen peroxide, or essential oils can effectively kill germs while minimizing harm to the environment.
Additionally, it is crucial to prevent toy cross-contamination by properly separating and categorizing toys. This can be achieved by having designated play areas for different age groups or by using color-coded bins or labels. By implementing these practices, we can ensure that preschool toys are not only clean but also safe for children to play with.
Now, let’s move on to preparing the toys for disinfection.
Preparing the Toys for Disinfection
First, gather all of your preschool toys and ensure they are free from any loose parts or debris.
When it comes to disinfecting preschool toys, there are a few important considerations to keep in mind. One of the main concerns is the toxicity of the disinfectants used. Many commercial disinfectants contain harsh chemicals that may be harmful if ingested or if they come into contact with sensitive skin. Therefore, it is recommended to opt for natural disinfection methods whenever possible. Natural disinfectants, such as vinegar or hydrogen peroxide, are effective at killing bacteria and viruses, while being safe for children.
To prepare the toys for disinfection, start by separating them into different categories based on their material. This will ensure that the appropriate cleaning method is used for each type of toy. Remove any loose parts or debris from the toys, as these can interfere with the cleaning process. Inspect the toys for any cracks or damage, as these areas can harbor bacteria and may need special attention during disinfection.
Now that the toys are prepared, let’s move on to the step-by-step guide to disinfecting plastic toys.
Step-by-Step Guide to Disinfecting Plastic Toys
Now that we have prepared the toys for disinfection, let’s move on to the step-by-step guide for disinfecting plastic toys.
It is important to choose eco-friendly disinfectants to minimize the environmental impact. Look for disinfectants that are labeled as non-toxic, biodegradable, and free from harmful chemicals such as chlorine bleach or ammonia.
One common mistake when disinfecting plastic toys is not properly diluting the disinfectant solution. Always follow the instructions provided by the manufacturer to ensure the correct concentration. Another mistake is not allowing enough contact time for the disinfectant to work effectively. Remember to leave the toys submerged or sprayed with the disinfectant for the recommended amount of time.
To begin the disinfection process, prepare a solution of the eco-friendly disinfectant according to the instructions. Submerge the plastic toys in the solution or use a spray bottle to apply the disinfectant evenly. Make sure to cover all surfaces of the toys, including any crevices or hard-to-reach areas. After applying the disinfectant, leave the toys to air dry completely before allowing the children to play with them.
Transitioning to the subsequent section about the step-by-step guide to disinfecting stuffed toys, it is important to note that these toys require special attention due to their fabric material and potential for harboring germs.
Step-by-Step Guide to Disinfecting Stuffed Toys
When cleaning stuffed toys, it’s crucial to consider the fabric material and the potential for harboring germs. Stuffed toys are often made of soft and porous materials that can easily absorb and hold onto dirt, dust, and bacteria. To ensure the safety of children and prevent toy contamination, it is important to follow safe disinfection techniques for stuffed toys.
The first step in disinfecting stuffed toys is to check the care label for any specific cleaning instructions. Some toys may be machine washable, while others may require handwashing or spot cleaning. If machine washing is allowed, place the toy in a laundry bag or pillowcase to protect it during the wash cycle. Use a mild detergent and select a gentle cycle with cold water. Avoid using bleach or harsh chemicals as they can damage the fabric.
For non-washable stuffed toys, you can use a disinfectant spray or wipes specifically designed for toys. Look for products that are non-toxic and safe for use around children. Thoroughly spray or wipe down the toy, paying attention to all surfaces, seams, and crevices. Allow the disinfectant to sit for the recommended amount of time indicated on the product label. Afterward, use a clean cloth or paper towel to remove any excess moisture.
By following these safe disinfection techniques, you can effectively remove dirt, dust, and bacteria from stuffed toys, preventing the risk of contamination and keeping them clean and safe for children to play with.
Moving on to the next section, let’s now explore a step-by-step guide to disinfecting wooden toys.
Step-by-Step Guide to Disinfecting Wooden Toys
When it comes to disinfecting wooden toys, there are a few key points to consider.
First, choosing the right cleaning solution is crucial to ensure effective disinfection without damaging the wood.
Second, proper drying after disinfection is essential to prevent the growth of mold or mildew.
Lastly, it is important to establish a regular frequency for toy disinfection to maintain a clean and safe play environment for children.
Cleaning Solutions for Toys
Toys can be disinfected using a mixture of bleach and water. This is a highly effective method for killing germs and ensuring the toys are safe for children to play with. However, there are also natural disinfectant options available for those who prefer to avoid harsh chemicals. Here are some toy cleaning techniques to consider:
- Use a mixture of vinegar and water: Vinegar is a natural disinfectant that can effectively kill germs on toys.
- Try hydrogen peroxide: Hydrogen peroxide is another natural option for disinfecting toys and eliminating bacteria.
- Utilize tea tree oil: Tea tree oil has antimicrobial properties and can be mixed with water to create a safe cleaning solution.
- Consider using steam: Steam cleaning is a chemical-free method that can effectively sanitize toys.
After disinfection, it is important to properly dry the toys to prevent moisture buildup and the growth of mold or mildew.
Drying After Disinfection
After disinfecting, it’s crucial to properly dry the toys to prevent moisture buildup and the growth of mold or mildew. One effective way to dry the toys is by using air drying methods. Simply place the toys in a well-ventilated area, ensuring that they are spread out to allow for proper airflow. This method allows the toys to naturally dry without the need for additional tools or equipment.
Additionally, you can use a clean, dry cloth to wipe away any excess moisture before placing the toys for air drying. Another option is to gently pat the toys dry with a towel. If you prefer a more convenient approach, you can also use a disinfectant wipe that has a quick-drying formula. This allows for efficient drying while ensuring the toys remain germ-free.
When it comes to the frequency of toy disinfection, it is important to establish a regular schedule to maintain a clean and safe environment.
Frequency of Toy Disinfection
Now that we understand the importance of drying toys after disinfection, let’s discuss the recommended frequency of toy disinfection.
Regular disinfection is crucial in preschool settings to maintain a clean and hygienic environment for children. Toys should be disinfected on a regular basis to minimize the spread of germs and prevent illnesses.
The frequency of toy disinfection depends on various factors, including the type of toy, the number of children using them, and the level of contact with bodily fluids. Ideally, high-touch toys such as those shared between multiple children or those frequently put in their mouths should be disinfected daily or after each use. Other toys may require disinfection once a week or every few weeks.
Now, let’s move on to the next section, where I will provide a step-by-step guide to disinfecting soft toys.
Step-by-Step Guide to Disinfecting Soft Toys
Start by gathering all the soft toys you want to disinfect. Disinfecting toys is especially important during cold and flu season to prevent the spread of germs. When choosing disinfectants for soft toys, it’s important to opt for eco-friendly options that are safe for children and the environment.
Look for products that are free from harsh chemicals, such as chlorine bleach or ammonia, as these can be harmful if ingested or cause skin irritations. Instead, choose disinfectants that are made from natural ingredients, like hydrogen peroxide or vinegar.
To begin the disinfection process, remove any visible dirt or debris from the toys by gently brushing or shaking them. Next, prepare a solution of the chosen eco-friendly disinfectant and warm water according to the instructions on the product label. Submerge the soft toys in the solution and let them soak for the recommended amount of time, usually around 10-15 minutes.
After the soaking period, rinse the toys thoroughly with clean water to remove any residue. Squeeze out excess water and allow the toys to air dry completely. It’s important to ensure that the toys are fully dry before returning them to the play area, as dampness can promote the growth of bacteria or mold.
Now that you know how to disinfect soft toys effectively, let’s move on to discussing the dos and don’ts of disinfecting electronic toys.
Disinfecting Electronic Toys: Dos and Don’ts
When it comes to disinfecting sensitive electronic surfaces, it is crucial to follow a proper cleaning protocol to avoid damaging the equipment.
One key consideration is selecting the appropriate disinfectant that effectively kills germs without causing harm to the electronics.
Additionally, it is important to be cautious about using excessive moisture and water when cleaning electronic devices as it can lead to irreversible damage.
Cleaning Sensitive Electronic Surfaces
To clean sensitive electronic surfaces on preschool toys, it’s important to use a disinfectant specifically designed for electronics. These surfaces require special care to avoid damage while ensuring effective disinfection. Here are four proper cleaning techniques for sensitive surface disinfection:
-
Gently wipe the surface: Use a soft, lint-free cloth to wipe the surface of the toy. Avoid using abrasive materials or excessive pressure, as this can scratch or damage the sensitive electronic components.
-
Use a mild detergent: Mix a small amount of mild detergent with warm water to create a gentle cleaning solution. Dampen the cloth with the solution and wipe the surface of the toy, focusing on areas that are frequently touched.
-
Avoid excessive moisture: Sensitive electronic surfaces can be damaged by excessive moisture. Make sure the cloth is only damp and not dripping wet. Avoid spraying or directly applying liquid to the toy.
-
Allow for proper drying: After cleaning, allow the toy to air dry completely before use. This will ensure that any remaining moisture evaporates, reducing the risk of damage to the electronic components.
By following these proper cleaning techniques, you can effectively disinfect sensitive electronic surfaces on preschool toys without causing any harm.
Now let’s move on to the next section: proper disinfectant selection.
Proper Disinfectant Selection
Choose a disinfectant that is specifically designed for sensitive electronic surfaces to ensure effective cleaning without causing damage.
When selecting a disinfectant for cleaning preschool toys, it is important to prioritize safety and eco-friendly options. Safe disinfectant alternatives include hydrogen peroxide-based cleaners, which are effective against a wide range of bacteria and viruses while being gentle on sensitive surfaces. These cleaners break down into water and oxygen, making them environmentally friendly. Another option is alcohol-based wipes or sprays with at least 70% alcohol content, which are effective against many pathogens and evaporate quickly without leaving residue.
It is crucial to avoid harsh chemicals, such as bleach or ammonia-based cleaners, as they can damage electronic components and pose health risks. By choosing safe and eco-friendly disinfection options, we can ensure the cleanliness and longevity of preschool toys without harming the environment.
Moving on to avoiding water damage…
Avoiding Water Damage
One effective way to prevent water damage is by keeping electronic devices away from liquids. Water damage can cause significant harm to electronic devices, leading to malfunctioning or complete failure.
To prevent water damage, it is crucial to avoid exposing devices such as smartphones, tablets, and laptops to any form of liquid, including water, beverages, or cleaning solutions. In case of accidental exposure, immediate action should be taken to minimize damage. This includes turning off the device, removing any external accessories, and gently drying the device using absorbent materials or a specialized drying technique.
By following proper drying techniques, such as using a desiccant or placing the device in a container with dry rice, the chances of restoring the device to its normal functioning state are increased.
Transitioning to the next section about best practices for disinfecting outdoor toys, it is important to note that water damage prevention is just one aspect of maintaining the longevity and functionality of electronic devices.
Best Practices for Disinfecting Outdoor Toys
When disinfecting outdoor toys, make sure you thoroughly clean all surfaces to prevent the spread of germs. This is especially important for playground equipment, as it is constantly exposed to various elements and can easily become a breeding ground for bacteria and viruses. Here are some best practices to keep in mind when disinfecting outdoor toys:
-
Use a mild detergent or a disinfectant specifically designed for playground equipment. These products are formulated to effectively kill germs while being safe for children to play on.
-
Pay special attention to areas that are prone to mold and mildew growth, such as corners, crevices, and areas that collect water. These areas should be thoroughly cleaned and dried to prevent the growth of harmful microorganisms.
-
Use a soft brush or cloth to scrub all surfaces, including slides, swings, and climbing structures. This will help remove dirt, debris, and any potential pathogens.
-
Rinse the toys thoroughly with clean water after cleaning to remove any remaining soap or disinfectant residue.
By following these guidelines, you can ensure that outdoor toys are properly disinfected and safe for children to play on.
Transitioning into the next section about disinfecting toys in a classroom setting, it is important to maintain a clean and hygienic environment to prevent the spread of germs among students.
Disinfecting Toys in a Classroom Setting
In a classroom setting, it’s important to regularly clean and sanitize the toys to maintain a hygienic environment for the students. This not only helps prevent the spread of germs and illnesses but also ensures the safety and well-being of the children. When it comes to disinfecting toys, choosing eco-friendly disinfectants is a responsible choice. These disinfectants are effective in killing germs, while also being environmentally friendly and safe for children.
To prevent cross-contamination, it is crucial to follow proper cleaning procedures. One effective method is to create a solution using eco-friendly disinfectant and water. This solution can be used to wipe down the toys, ensuring that all surfaces are thoroughly cleaned. It is recommended to use a separate cloth or sponge for each toy to avoid transferring germs from one toy to another.
Here is an example of a table that illustrates the process of disinfecting toys in a classroom setting:
| Step | Procedure |
|---|---|
| 1 | Prepare a solution of eco-friendly disinfectant and water |
| 2 | Use a separate cloth or sponge for each toy |
| 3 | Thoroughly wipe down all surfaces of the toy |
| 4 | Rinse the toy with clean water |
| 5 | Allow the toy to air dry before returning it to the play area |
How Often Should Preschool Toys Be Disinfected?
Regularly cleaning and sanitizing classroom toys is crucial to maintain a hygienic environment for students. But how often should preschool toys be disinfected? The frequency of disinfection depends on various factors such as the type of toys, the number of children using them, and the level of contact with bodily fluids.
In general, it is recommended to disinfect toys at least once a day, especially those that are frequently touched or mouthed by children. This includes toys that are shared among multiple children or those that come into contact with bodily fluids like saliva or mucus. Additionally, toys that are visibly soiled should be cleaned and disinfected immediately.
Regular disinfection of preschool toys offers several benefits. Firstly, it helps to prevent the spread of germs and infectious diseases among children. Young children are more susceptible to illnesses, and their immune systems are still developing. By disinfecting toys, we can reduce the risk of infections and keep children healthy.
Furthermore, regular disinfection also promotes a clean and safe learning environment. It demonstrates a commitment to hygiene and sets a good example for children to follow. It instills good habits and teaches them about the importance of cleanliness.
To ensure safe handling and storage of disinfected toys, it is important to follow proper procedures.
Ensuring Safe Handling and Storage of Disinfected Toys
To ensure safe handling and storage of disinfected toys, it’s important to follow proper procedures such as labeling and organizing them appropriately. Safe storage practices are crucial in preventing cross-contamination and maintaining the cleanliness of preschool toys. Here are some essential tips to ensure the safe storage of disinfected toys:
| Category | Procedure | Benefits |
|---|---|---|
| Labeling | Clearly label each toy with its name and the date it was last disinfected. | Helps track the disinfection history and identify any toys that may need re-cleaning. |
| Organizing | Store toys in separate containers or bins based on their type or age appropriateness. | Reduces the risk of cross-contamination and makes it easier to locate specific toys. |
| Rotation | Implement a rotation system to ensure all toys are regularly disinfected and used. | Allows for equal usage and prevents some toys from being neglected or forgotten. |
| Cleaning supplies | Keep cleaning supplies separate from toys and store them in a designated area. | Prevents accidental contamination of toys and ensures easy access to cleaning materials. |
| Regular inspection | Regularly inspect toys for any signs of damage or wear and discard or repair as needed. | Ensures the safety and longevity of toys while minimizing the risk of bacterial growth. |
Additional Tips for Maintaining Clean and Germ-Free Toys
By implementing these tips, you can ensure that the toys remain clean and germ-free while maintaining their quality.
Proper toy storage is crucial in preventing cross-contamination and reducing the risk of spreading germs in a preschool setting. One effective method is to designate specific areas or bins for different types of toys, such as puzzles, blocks, or stuffed animals. This helps to organize the toys and prevents them from being mixed together, which can lead to the spread of germs.
Additionally, it is important to regularly clean and disinfect the toy storage areas to further prevent contamination. This can be done by wiping down shelves and bins with a disinfectant solution, as well as regularly washing and sanitizing any soft storage containers.
It is also recommended to rotate toys in and out of storage to ensure that all toys have the opportunity to be cleaned and disinfected regularly.
Frequently Asked Questions
Can I Use Regular Household Cleaning Products to Disinfect Preschool Toys?
Yes, you can use regular household cleaning products to disinfect preschool toys. However, it is important to note that using vinegar as a natural disinfectant can be an effective and safe alternative.
Commercial disinfectants have pros and cons when used on preschool toys. While they may be more powerful in killing germs, they may also contain harmful chemicals.
It is crucial to consider the safety of the children and choose the most appropriate method of disinfection.
Is It Safe to Use Bleach on Plastic Toys?
Using bleach on plastic toys is generally safe, but there are alternative methods for disinfecting them. Bleach may cause the plastic to deteriorate over time, leading to cracks or discoloration.
To avoid this, consider using hydrogen peroxide or a mixture of vinegar and water as effective disinfectants. These alternatives are gentle on plastic and won’t cause any damage.
It’s always important to follow the manufacturer’s guidelines and thoroughly rinse the toys after disinfection.
How Long Should I Let the Disinfectant Sit on the Toys Before Rinsing?
When it comes to disinfecting preschool toys, it is important to consider the effectiveness of the disinfectant and the recommended brands.
One key factor to consider is the amount of time the disinfectant should sit on the toys before rinsing. The recommended duration may vary depending on the disinfectant brand.
It is crucial to follow the instructions provided by the manufacturer to ensure proper disinfection and the safety of the children.
Can I Use the Same Disinfectant for All Types of Toys?
Using the same disinfectant for all types of toys can be convenient, but it may not be the most effective method. Different toys have different materials and surfaces, which can react differently to disinfectants.
It’s important to consider the pros and cons of using natural disinfectants as well. While they may be safer for children, they may not be as effective at killing germs.
Ultimately, it’s best to follow the manufacturer’s instructions and use the appropriate disinfectant for each type of toy.
How Often Should I Clean and Disinfect Outdoor Toys?
When it comes to cleaning outdoor toys, it’s important to follow best practices for toy disinfection. Regular cleaning and disinfection of outdoor toys is recommended to prevent the spread of germs and keep children safe.
It’s advisable to clean and disinfect outdoor toys at least once a week, or more frequently if they have been used by multiple children or are visibly dirty. Using a disinfectant that is effective against a wide range of pathogens is key to maintaining a hygienic play environment.
Conclusion
In conclusion, maintaining a clean and germ-free environment for preschoolers is crucial for their health and well-being.
By regularly disinfecting preschool toys with the appropriate disinfectant, we can ensure that harmful germs are eliminated, reducing the risk of infections.
Following a step-by-step guide for disinfecting both plastic and stuffed toys will guarantee thorough cleaning.
It is also important to disinfect toys in a classroom setting and establish a regular schedule for toy disinfection.
By handling and storing disinfected toys safely, we can further prevent the spread of germs.
Remember, maintaining clean and germ-free toys is essential for a healthy learning environment for our little ones.