
Creating DIY cardboard garages and tunnels is an easy, budget-friendly way to boost active play and imagination for your child. Use sturdy large boxes, reinforce them with tape, and cut out doors and windows for easy access and fun visuals. Connect multiple pieces to make extended tunnels or multi-room garages, and personalize with colorful decorations or props. These structures are lightweight, safe when properly checked, and can be customized endlessly—continue exploring to find simple tips and ideas to make your play area even more exciting.
Key Takeaways
- Use large, sturdy cardboard boxes to create spacious garages and tunnels suitable for ride-on toys.
- Reinforce boxes with tape and cut out large openings for easy access and durability during active play.
- Connect multiple boxes with tape or flaps to build extended tunnels or multi-room garage setups.
- Decorate with markers, paint, or stickers to personalize structures and enhance imaginative play.
- Regularly inspect and reinforce structures for safety, ensuring smooth edges and secure connections.

Have you ever considered turning simple cardboard boxes into exciting play spaces? It’s a fantastic way to encourage your child’s imagination without spending much money. Cardboard garages and tunnels are easy props that transform ordinary boxes into thrilling vehicles and secret passages, perfect for ride-on play. With just a few supplies, you can create a setup that keeps your little one engaged for hours. These DIY projects promote active play, creativity, and problem-solving skills, making them an excellent addition to any playroom or backyard. Plus, they’re quick to assemble and easy to customize to your child’s preferences.
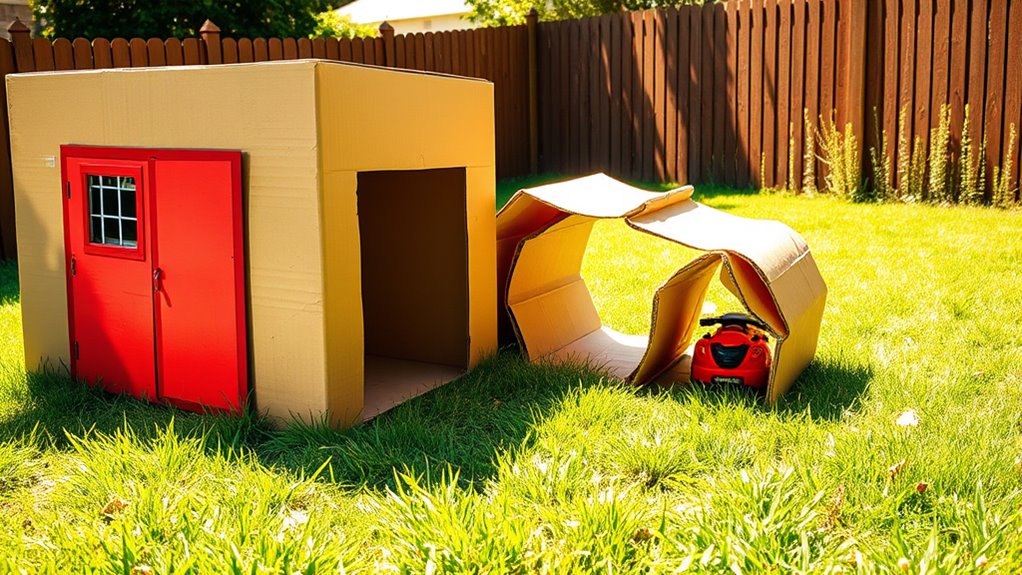
To start, gather large, sturdy cardboard boxes—think appliance or dresser boxes—since they provide enough space for kids to crawl through or sit inside comfortably. You can reinforce the boxes with tape to ensure they hold up to active play and don’t tear easily. Once you have your boxes, the fun begins. Cut out doors and windows to make the garage or tunnel inviting and accessible. For a garage, cut a large rectangular opening on one side to serve as a door, and consider adding details like painted lines to mimic a real garage. For tunnels, cut a long, narrow opening along the length of the box, creating a passage your child can crawl through. You can also connect multiple boxes with tape or flaps to build longer tunnels or multi-room garages.
Adding colorful markers, paints, or stickers can personalize these structures and make them more engaging. Let your child help with decorating—this not only sparks their creativity but also gives them a sense of ownership over their play space. To make it more realistic, you could add handles, wheels, or even pretend parking spots with chalk or tape on the floor. If you want to elevate the experience, incorporate props like toy cars, flags, or signs to turn the cardboard garage into a bustling vehicle station or secret hideout. Ensure safety by checking for sharp edges and removing any staples or tape that might peel off and cause a hazard.
These DIY cardboard garages and tunnels aren’t just fun—they encourage physical activity and imaginative storytelling. Your child can pretend they’re racing cars out of a garage or sneaking through secret tunnels on a mission. Because they’re lightweight, you can easily move or store them when not in use. They’re also environmentally friendly, reusing materials you already have at home. Overall, turning cardboard boxes into play props is a simple, affordable way to nurture your child’s creativity and keep them active, all while making the most of everyday household items.
Frequently Asked Questions
How Durable Are Cardboard Garages for Outdoor Use?
Cardboard garages aren’t very durable for outdoor use, especially if exposed to rain, wind, or prolonged sunlight. You’ll find they tend to weaken, tear, or get soggy quickly, making them less suitable for outdoor play. If you want something more resilient, consider using waterproof materials or placing them in a covered area to extend their lifespan. Keep an eye on weather conditions to prevent damage and make certain of safe play.
Can These Tunnels Be Used for Pets as Well?
A stitch in time saves nine, and yes, these tunnels can be great for pets too. Just guarantee they’re lightweight and sturdy enough for your furry friends to explore comfortably. Keep in mind, cardboard isn’t the most durable material outdoors, so supervise play to prevent tearing or damage. If you want a longer-lasting option, consider reinforcing the tunnels or using outdoor-safe materials. Your pets will love the fun and exploration!
Are There Eco-Friendly Materials Available for Building These Props?
Yes, you can find eco-friendly materials for building these props. Look for recycled cardboard, biodegradable plastics, or natural fibers like jute or hemp. These options are sustainable and safe for kids and pets. When constructing, choose non-toxic adhesives and paints to guarantee everything remains environmentally friendly. By selecting eco-conscious materials, you help reduce waste and minimize your carbon footprint while creating fun, safe play props.
How Long Does It Typically Take to Assemble a Cardboard Garage?
It usually takes about 20 to 30 minutes to assemble a cardboard garage. For example, a parent in our community built one with their kids over a weekend afternoon, making it a fun family project. You just need scissors, tape, and patience. Make sure to follow the instructions carefully, and you’ll have a sturdy, personalized garage in no time—perfect for hours of imaginative ride-on play.
What Safety Precautions Should Parents Take During Construction?
You should supervise your child at all times during construction and guarantee the workspace is safe and clutter-free. Use non-toxic, child-safe adhesives and tools, and avoid sharp edges or small parts that pose choking hazards. Work in a well-ventilated area, and encourage your child to wear protective gear if needed. Always double-check that the structure is stable before allowing your child to play inside.
Conclusion
Ready to get creative? With just cardboard, you can craft garages and tunnels that turn ordinary play into extraordinary adventures. These props spark imagination and encourage active play, all while being budget-friendly and eco-friendly. So why not transform your child’s playtime today? After all, isn’t every child deserving of a world where their imagination runs wild? Grab some boxes and start building—your little explorer is waiting to discover new worlds right at home!