
To build a garage and guarantee a smooth process, start with early engineering by creating a cardboard model. Sketch your design, cut out scaled pieces, and assemble them to mimic your garage’s structure. This hands-on approach helps you spot potential issues, make adjustments easily, and refine your plans before construction begins. By testing your ideas upfront, you’ll save time and money—and if you keep going, you’ll discover even more tips for successful garage building.
Key Takeaways
- Create scaled cardboard models to visualize garage design and identify potential spatial issues early.
- Use the model to test and adjust layout, door placement, and structural elements before construction begins.
- Incorporate details like windows and roofing to refine aesthetic and functional aspects of the garage.
- Detect design flaws or awkward spaces early, saving time and reducing costly revisions later.
- Enhance understanding of construction processes and improve communication with builders through tactile modeling.
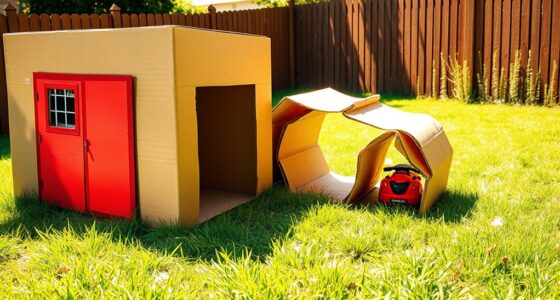
Are you ready to expand your home and add valuable storage? Building a garage is a practical project that can improve your property’s functionality and value. Before you delve into the actual construction, trying an early engineering step with cardboard can save you time and money. This simple yet effective method allows you to visualize the design, identify potential issues, and make adjustments without costly mistakes.
Start by sketching out your garage plan on paper, noting dimensions, door placements, and any windows or features you want. Once you have a clear idea, gather large pieces of cardboard—old boxes work perfectly. Using a ruler and marker, cut out pieces that match your planned dimensions. These cardboard pieces serve as your physical model, helping you see how the structure will look and fit in your space. As you assemble the cardboard, you can easily adjust walls, doorways, or the roof. This hands-on approach helps you understand spatial relationships and proportions better than just visualizing on paper.
Sketch your garage plan on paper, then create a scaled cardboard model to visualize and adjust your design easily.
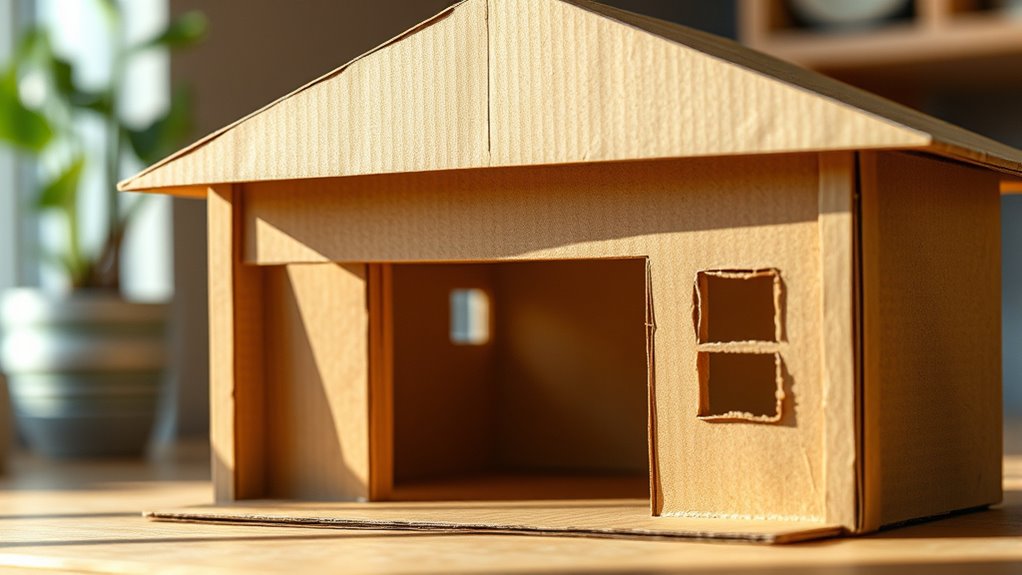
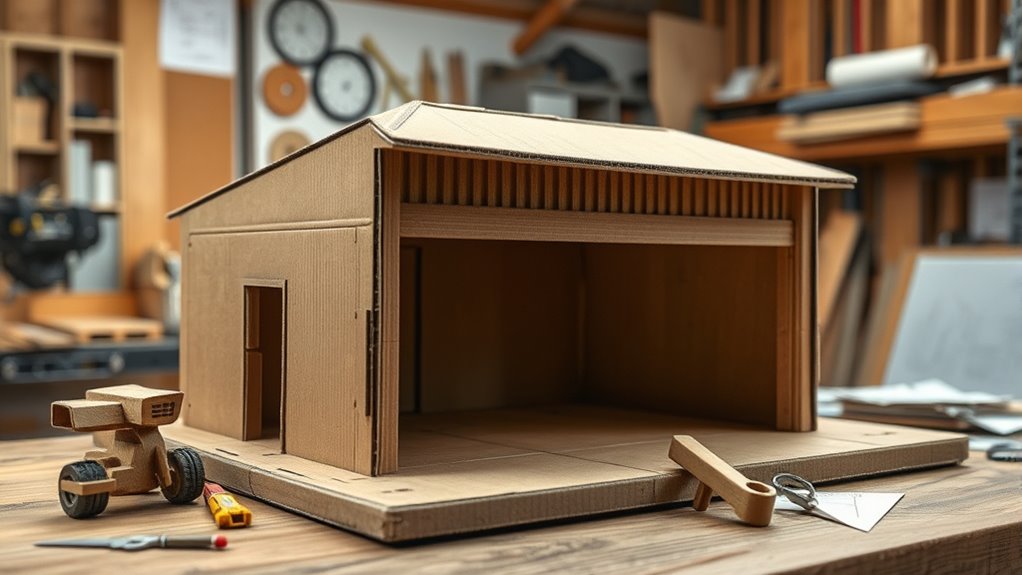
When constructing your cardboard model, consider the scale carefully. For example, if your garage will be 20 feet wide and 24 feet deep, cut your cardboard pieces to a smaller, manageable scale, like 1 inch representing 1 foot. This way, your model remains portable and easy to modify. Use tape or glue to hold the pieces together, simulating the framing of your garage. You can also add details like windows or garage doors using additional cardboard strips or cutouts. This tactile process gives you a sense of how the actual construction will come together, highlighting any awkward spaces or design flaws that weren’t obvious on paper.
As you work through your cardboard model, take notes on what works and what doesn’t. Maybe the door seems too narrow or the roof needs extra support—these insights help you refine your plans before you start actual building. It’s much cheaper and faster to tweak your cardboard model than to redo a real structure. Plus, this exercise boosts your confidence and understanding of the construction process.
Using cardboard for early engineering isn’t just about visualization; it’s a strategic step that guarantees your final garage design is functional, efficient, and tailored to your needs. It helps you anticipate challenges, optimize space, and communicate your ideas to contractors or helpers. Additionally, understanding the role of contrast ratio in your design can help you plan lighting and interior finishes effectively. When you finally move on to actual construction, you’ll have a clearer, more precise plan—making the whole process smoother and more enjoyable. Building a garage with this simple tool sets a strong foundation for a successful project, turning your vision into reality with less stress and more confidence.

The CityBuilder Garage & Shop Cardboard Model Making Kit – O Scale Model Railroad Building
Made of CARDBOARD. Self construction model making kit. Needs to be constructed.
As an affiliate, we earn on qualifying purchases.
As an affiliate, we earn on qualifying purchases.
Frequently Asked Questions
What Safety Precautions Should I Take When Building With Cardboard?
When building with cardboard, you should wear gloves to protect your hands from cuts and rough edges. Work in a well-ventilated area to avoid inhaling dust or fumes from adhesives. Keep scissors and cutting tools sharp and handle them carefully to prevent injuries. Make sure your workspace is clean and organized, and supervise children during the project. Always follow safety guidelines to enjoy a fun, injury-free building experience.
How Long Does a Cardboard Garage Typically Last Outdoors?
A cardboard garage typically lasts a few days to a few weeks outdoors, depending on weather conditions. You’ll face challenges from rain, humidity, and sun that break down the material quickly. To extend its life, you should reinforce it with waterproof coatings, elevate it off the ground, and place it in a sheltered spot. Recognize that cardboard isn’t designed for long-term outdoor use, so plan accordingly.
Can I Customize the Size and Design Easily?
Yes, you can easily customize the size and design of your cardboard garage. Simply cut and fold the cardboard to match your desired dimensions, and use tape or glue to assemble parts. You can add windows, doors, or decorative elements to personalize it further. Just keep in mind that modifications might affect its stability, so take your time and reinforce areas as needed for durability and your specific needs.
What Tools Are Recommended for Cutting and Assembling Cardboard?
You should use a craft knife or utility knife for cutting cardboard, as they give you precise control. A ruler or straight edge helps make straight cuts, while scissors work for smaller, detailed cuts. For assembling, hot glue guns and tape are your best options; hot glue provides strong bonds quickly, and tape is handy for temporary fixes. Always work on a safe surface and handle blades carefully.
Is It Suitable for Storing Heavy or Valuable Items?
You might be taking a big risk storing heavy or valuable items in a cardboard garage, as it’s not built for durability. Cardboard is like an open book when it comes to strength; it can buckle under pressure or moisture. If you want peace of mind, consider a sturdier material like wood or metal. Think of this as putting all your eggs in one basket—better safe than sorry.
The CityBuilder Garage & Shop Cardboard Model Making Kit – O Scale Model Railroad Building
Made of CARDBOARD. Self construction model making kit. Needs to be constructed.
As an affiliate, we earn on qualifying purchases.
As an affiliate, we earn on qualifying purchases.
Conclusion
Now that you’ve mastered the art of cardboard construction, who needs real tools or materials? Your garage may not withstand a hurricane, but it’s perfect for showcasing your impressive engineering skills—crafted entirely from recycled dreams. Remember, if your cardboard masterpiece doesn’t hold up, just call it modern art. After all, nothing says “future architect” like a structure that’s as sturdy as a cardboard box in a rainstorm. Keep building—who needs reality when you’ve got imagination?

Build Your Own Garage Manual: More Than 175 Plans: Step-By-Step Instructions (Creative Homeowner) Techniques, Tips, Diagrams, and More for DIY Building, plus a Catalog of Available Plans
As an affiliate, we earn on qualifying purchases.
As an affiliate, we earn on qualifying purchases.

3pcs 11.8"x11.8" Skyline City Building Wall Stencil Templates, Skyscraper Cityscape Reusable Plastic Stencil for Painting on Wood Floor Tile Fabric Glass Furniture Splicing DIY Home Decor Template
Skyline City Buildings Pattern Stencils: Can meet your different needs, well made and fun to creat craft projects…
As an affiliate, we earn on qualifying purchases.
As an affiliate, we earn on qualifying purchases.